
By Bob Rush • Bench Tips column
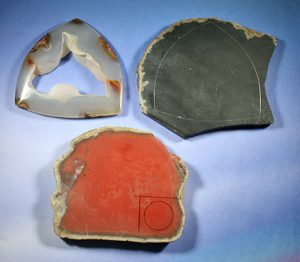
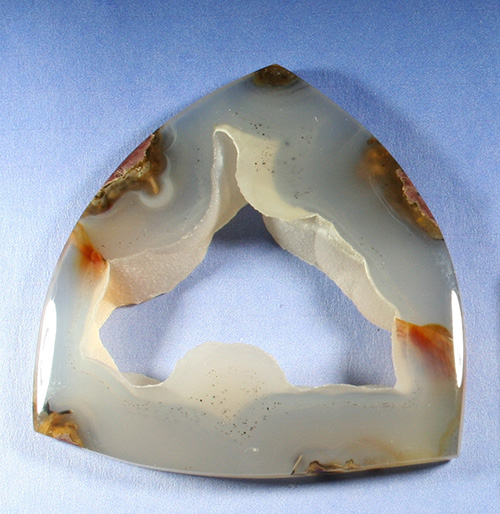
A few weeks ago, when I was cutting slabs off the face of a Black Rock Desert geode, a striking vug with a really neat shape was revealed. It challenged me to make a cab with the vug as the central focus. After finishing the cab, I was left with an “empty,” or perhaps “lonely”, feeling. If the cab were to be made into a pendant as it was, the center opening would just draw your attention to whatever was behind it, be it a piece of clothing, bare skin, or whatever.
Considering Backing for Cab
for a small hemisphere.
The cab was demanding to be filled with something. My first thought was to back it with a material that had a pattern, but I couldn’t find anything small enough or eye-catching enough to work well. Next, I held various solid colors of backing material behind the opening, including red jasper, blue sodalite, and green jasper. None of these seemed right for the piece.
I finally settled on a piece of jet-black Basanite with a polished surface. This indeed improved the look, but something was still missing. The pattern in the cab had a look like it was wrapping itself around something, but figuring out what that something was to be was my challenge. After digging around on my bench, I came across a small slab of bright-red jasper. It would be perfect for a small hemisphere that could represent the sun.
I preformed the hemisphere as usual and domed it on my small flat lap with the small sphere-grinding cup. I checked the size to ensure it would fit into the opening as I carefully selected the location on the Basanite backing to be sure it would fit within the opening in the cab.
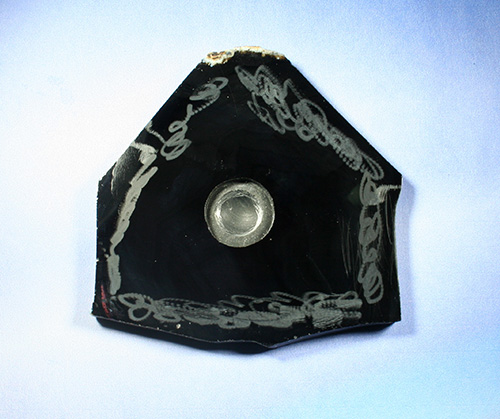
Aluminum Marking Piece Adds Needed Contrast
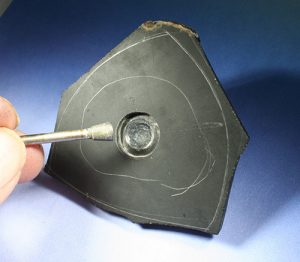
With the position located, I used my diamond ball burs to establish the hole in the basanite
was used to establish the seat and
grind the perimeter.
in which to embed the jasper sun. I used a bur that was about 1 mm smaller than the jasper hemisphere; I do the final fitting after I establish the seat for the jasper stone. With an opaque, black material, seeing how deep to make the seat is very difficult, even with bright lighting. I used an aluminum marking piece to coat the inner side of the round hole so I would have a clear contrast with the Basanite when grinding the depth for the seat. Using an inverted cone-shaped diamond bur to establish the seat as well as grinding the perimeter to fit the jasper stone.
As I grind the perimeter, I very frequently check for an exact fit to the jasper piece. When I am slowly grinding for the fit, I make sure the hole is perfectly round, primarily by grinding an equal amount all around the inside of the edge. With the jasper stone fitted to the hole, I re-sanded the surface of the basanite to get below any chips and followed with a polish on the basanite.
I roughed the area on the basanite where the Epoxy 330 was to be applied. While applying epoxy, I stayed away from the edge of the inner cab pattern so that no excess adhesive got squeezed out where it would be visible from the front of the cab.
The final steps were to glue the jasper sun into its hole, assemble the cab and its Basanite backing, finish the girdle shape, and polish the back. I feel the empty hole in the cab was fittingly filled in the final product.
Author: Bob Rush
 A professional within the lapidary industry since 1958 and metal work and jewelry since 1972.
He teaches at clubs and at Camp Paradise.


")

