
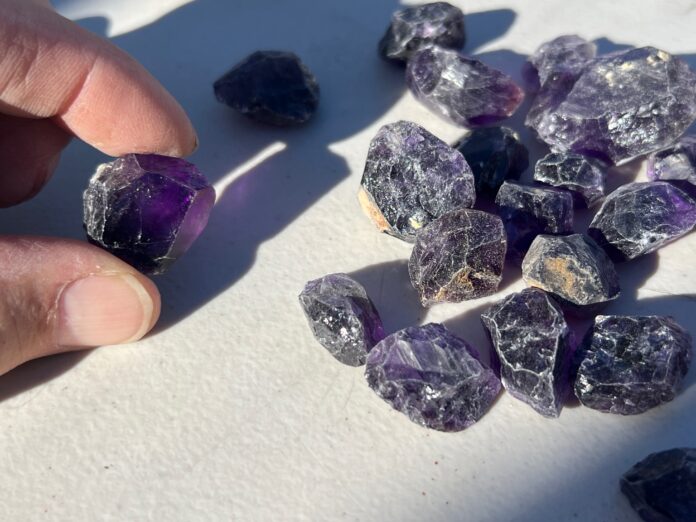
Learning how to make beads from your favorite rocks is a rewarding way to turn rockhounding finds into wearable art. Whether you prefer natural stone shapes, polished rounds or precision-faceted gemstones, making your own beads lets you create jewelry that’s truly one of a kind.
Creating handmade gemstone beads begins with selecting the right material, drilling a clean hole and carefully shaping and polishing each piece. From simple pebble beads to faceted gemstone designs, this guide explains the tools, techniques and safety tips you’ll need to transform ordinary rocks into beautiful custom beads.
Key Takeaways
- Learning how to make beads starts with choosing quality stone and the right diamond tools.
- Always drill stone under water to reduce dust and help extend the life of diamond bits.
- You can create handmade beads by drilling natural stones, cutting bead blanks or faceting gemstones.
- Let diamond tools do the work—excessive pressure shortens the life of drill bits and blades.
- Experiment with different bead shapes, finishes and stone types to create unique jewelry from your rock collection.
How to Make Beads: Choose Your Method
There are several ways to make stone beads. One is to use the natural shape and finish of small stones. This can be fun and only requires drilling. These natural shapes tell a story. Another method for how to make beads is to cut shapes on a saw and then finish them on a flat lap, cabbing or faceting machine. A third method is to cut a cylinder using a diamond hole saw bit, drill a hole in the center, and then shape or polish the bead.
On a side note, making beads enhances your appreciation for softer stones. After drilling some hard glass from old insulators, I cut some stabilized turquoise, and the difference was remarkable.
The process of making your own stone beads requires essential tools and materials to get started. Here’s what you’ll need throughout the process.
Drilling a Hole for Stone Beads
Drilling a hole is essential, and diamond bits are the preferred choice to do this. Some softer stones can be drilled using carbide drill bits that are commonly used on stone, glass and tile.
Diamond bits are available in small sizes suitable for beads, typically ranging from 1mm to 4mm. I prefer larger sizes, like 3mm or 4mm for the hole. You can use a Dremel tool, a drill press or a gem drill. Covington Engineering manufactures a gem drill that can spin the diamond bit faster than a conventional drill press. Additionally, they produce a Belgian chuck that allows water to flow into the center of a hollow bit, enhancing flushing and potentially extending the bit’s lifespan.
The crucial aspect is to drill only stones submerged in water. This process prevents dust, which can be toxic if it enters your lungs. Be aware of the inherent risks associated with specific materials. For instance, abalone shells are as beautiful as they are toxic. Malachite also poses significant toxicity. Most people rely only on water to contain dust, but I know a professional jade carver who wears a protective mask even when using water.
Holding the bead can also be challenging, and it’s best not to hold it with your hand because a drill bit can sometimes grab the stone and spin it rapidly. A bead vice can be used, or a specially designed wooden pair of tongs (bead holder) can be constructed for this purpose. Wrapping a pair of pliers with duct tape can create a sturdy holder that won’t scratch the stone’s surface.
Cutting and Shaping Your Beads
Covington Engineering makes a bead mill that can refine shapes into spheres after hand-cutting cubes and removing the corners. The mill spins the beads around between two plates with semi-circular grooves, similar to tumbling; a series of grits is used to achieve the desired polish. Drilling is the last step when using a bead mill or tumbler, because holes can get clogged by small particles.
I use a standard drill press to cut the cylindrical shape using the diamond core bit. Ensure the piece is submerged in water and use a diamond extender fluid if desired. Place a small piece of wood or similar material in the bottom of the water dish to prevent the bit from grinding the dish.
Before starting, mark the stone with a Sharpie to indicate the desired starting point. Alternatively, you can mark the center hole at this stage or wait until the “blank” is ready for drilling.
Using the hole bit, begin gently grinding the cylindrical shape. Once it starts, you can apply a bit of pressure. Allow the bit to cut at its own pace; avoid excessive pressure, as it can shorten the bit’s lifespan. After cutting the cylinder, proceed to drill the center hole. Mark the center to enhance accuracy. Drill from each side toward the center. This ensures that the holes are centered on each side and that they meet in the middle.
Tips for Shaping Stone Beads
Always be cautious with water and electricity. Ensure your cords are out of the way and plugged into a GFCI-type outlet for added protection.
Not all diamond bits are created equal. Many inexpensive bits are plated, while longer-lasting, more expensive bits are sintered. Sintered bits are made from a diamond and bronze compound using heat and pressure to create a bit or blade with significantly more depth for the job. However, they are more expensive.
Pushing hard on any diamond bit will significantly reduce its lifespan. The cheaper bits tend to wear down quickly, but you must consider the cost of using many inexpensive bits versus fewer expensive bits. Allow the bit to cut at its own pace. Pay attention to how fast it cuts and maintain a steady light pressure. Is this easy? No. Drilling is a slow process that can be a great opportunity for meditation.
Should You Drill or Shape First?
Most people form the bead and then drill the hole. However, there are advantages to drilling the hole first. By doing this, you can center it by adjusting the outside of the bead to be evenly thick from the hole outward. With a hole, you can hold the bead using a wire or string, making the shaping easier. You can even insert a very small brass dop into the hole. This allows me to spin the bead and make it perfectly symmetrical. Then, I cut facets.
The longer the bead, the deeper the hole, of course. That’s why many people choose to slab material first, making the slabs 1/4’ to 1/2’ thick. Then, they use a diamond hole bit to cut the blanks and either drill the center hole or cut and polish first, then drill.
Another option is to saw-cut the slab into squares and then shape the pieces by hand. Follow up with a polish, again to the desired grit. I usually pre-polish with 3000 grit, then for a gemstone, polish with cerium oxide for quartz, or 14,000 diamond for other stones. A more rustic stone bead can be finished at 600-3000 grit and look great. When possible, I move my drill or saw outside so that I can change the water frequently, giving the swarf to the trees.
You can use your imagination to shape the beads. Round, heishi (disk), olive, cube, tube, coin, bi-cone and melon are a few of the classic shapes. You can also make fantasy shapes that have a twist or resemble an organic form, like a flower, butterfly or turtle.
How to Facet a Gemstone Bead
For a fancy faceted bead, start by pre-forming on a 120-grit lap or on your cabbing machine. Next, drill the bead starting on one side and passing all the way through from that direction. The advice about drilling from each side doesn’t apply because you’ll insert a small-sized dop into the hole, so it needs to be perfectly symmetrical. After drilling, use dop wax or glue to secure the bead onto the dop. For heat-sensitive stones, use glue.
Now, the exciting part begins. Insert the dop into the quill of your machine and disengage the index gear to enable “free wheeling.” Lower the head to a 90-degree angle, similar to cutting a girdle on a faceted stone. Rotate the stone on the spinning lap to achieve a symmetrical base before faceting. It’s best to cut the facets with a 600-grit sintered lap, jotting down the angles and index gear positions as you go. You’ll need to return to these positions to polish the bead.
Faceting Patterns for Making Beads
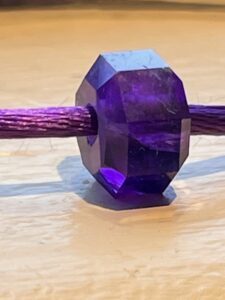
An easy pattern is to follow the 96 index gear markings for a standard round brilliant (SRB) cut; the ULTRA TEC has unique markings at appropriate intervals. I keep it simple by cutting the main flat surfaces at 90 degrees and then adding a bevel at 40 to 50 degrees on the side to prevent chipping. Of course, you can add as many facet tiers as you like. Beads are more prone to being tossed around than faceted stones, so keep that in mind. After cutting and polishing the main surfaces, turn the bead on its side using a table adapter or set the angle to zero degrees.
Setting to zero and “plunging,” as it is called, has its dangers. I repeat the mantra “left is up” to avoid lowering the head by mistake and the bead or stone catching on the lap. Cut and polish the side that now faces down (this step is optional).
Finishing Your Handmade Beads
Once done, transfer the bead to a different dop inserted on the opposite side to cut the bevel and side that was facing the machine initially. After re-dopping, repeat the steps to make the bead symmetrical.
Some people prefer a polished hole when cutting transparent material. Using felt tips, you can polish the inside edge of the hole with 3000-14,000 grit diamond, which will only polish the first part of the hole. Next, apply diamond and oil to a piece of cotton twine that’s about the size of the hole.
Secure one end of the string in a vice or any other way. Rapidly slide the bead back and forth on the string. It’s incredible how quickly this improves the appearance of a bead made of clear quartz, citrine or similar transparent materials.
Drilling can be tedious, so remember that softer stones are quicker and easier for making beads. Turquoise, apatite, red jasper, obsidian, epidote and onyx are a few stones that cut and polish quickly. I avoid petrified wood and other stones from the area surrounding the Petrified Forest because they are very hard and can damage the bits and blades. I once made a bead from red jasper that I assume had also petrified, and it took me four hours to drill just half an inch. Never again!
Frequently Asked Questions
What stones are best for making beads?
Softer materials such as turquoise, obsidian, red jasper, apatite and onyx are generally easier to drill and shape than extremely hard stones.
What tools do I need to make stone beads?
Most projects require diamond drill bits, a drill press or rotary tool, water for cooling, polishing equipment and a secure way to hold the stone while drilling.
Can I make beads without a faceting machine?
Yes. Many handmade beads are shaped with a cabbing machine, flat lap or simple grinding tools. Faceting is optional and creates a more decorative finish.
Why should stone always be drilled under water?
Water cools the drill bit, reduces airborne dust and improves safety when working with materials that may produce harmful particles.
Can beginners learn how to make beads?
Absolutely. Starting with softer stones and simple rounded shapes helps beginners develop drilling and polishing skills before attempting faceted beads.
Final Thoughts on How to Make Beads
Learning how to make beads opens the door to an entirely new way of enjoying your rock collection. Instead of admiring favorite specimens on a shelf, you can transform them into custom jewelry that tells the story of where each stone was found. Whether you create simple polished beads or intricate faceted designs, every project helps build your lapidary skills while producing something uniquely your own.
As you experiment with different materials, shapes and finishes, remember that patience and safety are just as important as the tools you use. Work slowly, keep your stones submerged while drilling and let the diamond tools do the cutting. Before long, you’ll be wearing handmade beads crafted from rocks you’ve collected yourself—a rewarding way to carry a piece of every adventure wherever you go.
How to Make Beads: Step-by-Step Photos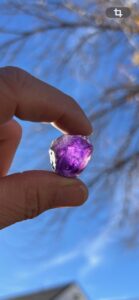 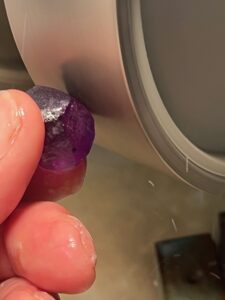 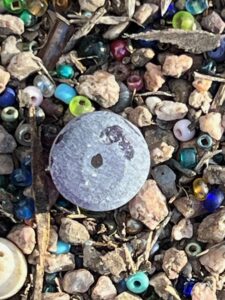 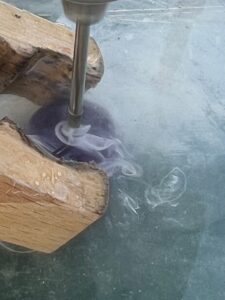 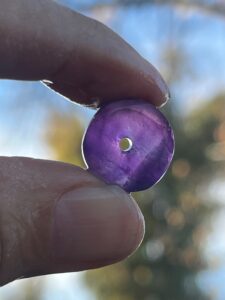 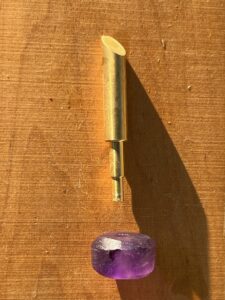 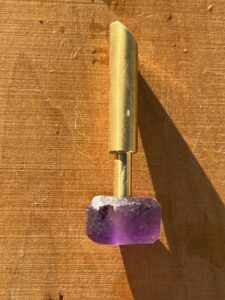 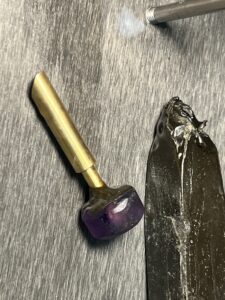 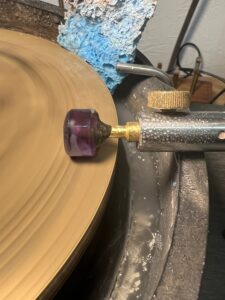 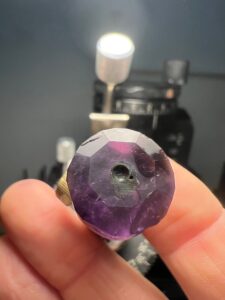 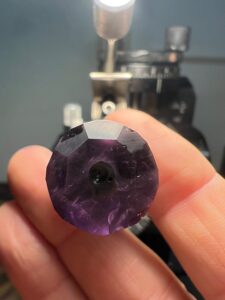 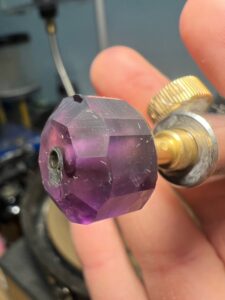
|
Want to take your lapidary skills even further? Subscribe to Rock & Gem for expert tutorials, project ideas, equipment reviews and inspiration that will help you get even more from every rock you collect. Story and photos about how to make beads by David Smith.