
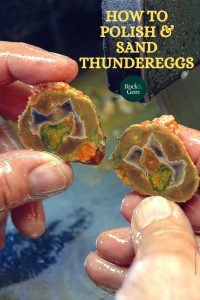
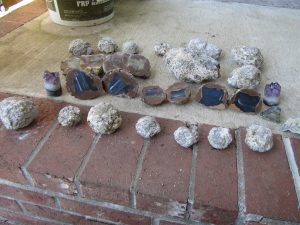
How to cut thundereggs is a basic question since the “good stuff” is inside. Once your thunderegg is open, two basic lapidary machines can be used to sand and polish thunderegg halves quickly. Both involve sanding the pieces dry.
Safety First: Because these machines create a lot of silica dust, suitable respiratory protection must be worn. Different types of respirators are available, and you must follow the instructions for each type to determine the level of protection you require.
High-Speed Sander
Knowing how to cut thundereggs is the first step to beautiful specimens. After that, sanding and polishing is key to a beautiful final product. One machine to achieve this is the Richardson’s Ranch high-speed sander. It is an inverted sanding disk utilizing a seven-inch diameter wheel with silicon carbide sanding disks. When using this sander, you hold the stone up to the rapidly spinning disk and move it about to sand off the saw cutting marks and any scratches present. I don’t often use this machine because my arms tire from holding the rock against the wheel, which also tends to leave circular sanding marks on the thunderegg.
Wheel Unit
My preferred machine is a horizontal shaft eight-inch diameter wheel unit. I have a three-inch wide Expando drum that I use with silicon carbide sanding belts running dry. If you sand with water, the process is slower because the water acts as a lubricant. This technique results in the rock tending to slide over the sanding belt’s surface, reducing contact with the sanding surface.
Sanding dry allows better contact with the grit on the belt, so the process is much quicker. Please note that there could be an issue with heat buildup, but because of the thunderegg’s mass, it absorbs and distributes the heat readily, so there isn’t much heat buildup. I routinely feel the stone’s surface to detect any heat buildup. If it feels warm to the touch, I stop and wipe it with a wet rag until it cools down.
How to Cut Thundereggs: Watch for Heat Buildup
If you are working with slabs, heat buildup can occur quickly because of the lesser mass of rock, so you have to monitor this heat buildup more frequently. This sanding process should not be used on heat-sensitive materials like opal or other such materials. I work with many obsidian slabs, which are not particularly heat-sensitive, though I don’t recommend placing the hot stone directly into water to cool them off. The shock of the cold water on the hot surface could crack the material.
How to Cut Thundereggs: Sanding Steps
Start with a very well-worn 80-grit belt and move the piece up and down on the belt. I don’t rock it away on the belt as I get to the edges because I want to keep the whole surface flat. As you observe the surface, you can see it become smooth as the saw scratches are removed. This step will take about 10 minutes to complete. I only sand in one direction and reverse the stone to stay in that direction. I don’t want to have a multiple-direction sanding pattern to try to see my progress. When I have removed all of the saw marks and any small pits or fractures created by the diamonds on the saw blade, I move to the next belt. The next belt is a worn 400-grit belt. The sanding direction remains the same as before. This time I’m looking for a very fine sanding appearance across the whole surface. This step should take about five minutes.
The final step for how to cut thundereggs is to polish the piece with cerium oxide on my twelve-inch diameter slow-turning polish wheel covered with a low-knap office carpet. This step will take about 15 minutes to complete.
This story about how to cut thundereggs previously appeared in Rock & Gem magazine. Story by Bob Rush. Click here to subscribe.


