
Ever wondered how to use your cabochons for jewelry making? Here’s how to make a cabochon creation joining Brazilian agate and Laguna agate into one beautiful piece.
Many of us have some level of barely started or otherwise unfinished projects stashed away in our studio or shop waiting for the idea or motivation to work on them. Usually, I make my cabs somewhat larger for displaying at shows. I don’t often make my cabs for jewelry use, but this month’s jewelry theme gave me an excuse to resurrect a long-buried, but not forgotten project.
After struggling to remember what I did with a particular pair of preforms five years ago, I found them together surprisingly quickly. The intended design was to have one piece nested into the larger one. The larger one is a slab of Brazilian agate with contrasting color bands. The smaller piece is a small cab of Laguna agate.
Making the Cabochon
I started with shaping the Brazilian agate slab into a semi-circle with an inverted curve in the bottom to accommodate the smaller cab. I also sketched a design at the top so I could carve a tab that I could drill through for stringing the piece on as a necklace. I shaped the Laguna agate into a pointed teardrop shape sized to fit into the bottom of the larger cab.
I shaped the curve in the larger piece with a silicon carbide Mizzy wheel. The Brazilian agate piece was ready for carving the ridges across the face. I started carving the ridges in the face of the Brazilian agate with a small diamond wheel. I followed this by enlarging and shaping the grooves with a shaped Mizzy wheel. The next step involved sanding the groves with a shaped 220-grit silicon carbide sanding block. The final sanding was done with various shapes of wood bits and a slurry of 220-grit tumbling media. The polishing was done with shaped wood bits and a slurry of cerium oxide.
I drilled the inside curve on the bottom of the Brazilian agate and the top of the Laguna agate cab with a 1mm diamond core drill so I could install a silver wire loop in each of the holes. I used Epoxy 330 to glue the wire loops into the stones. I assembled the stone pieces by connecting the silver loops. I’m pleased with how the project turned out.
Steps by Photo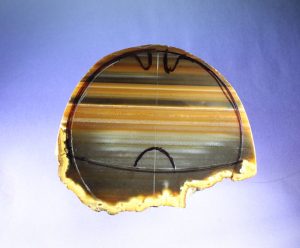  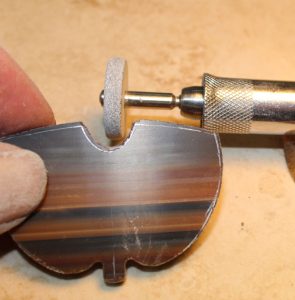 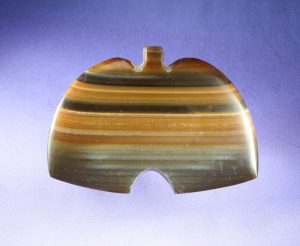 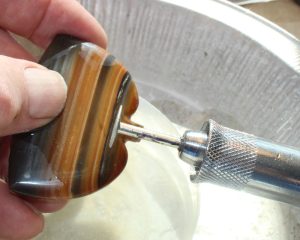 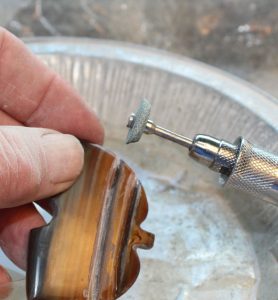 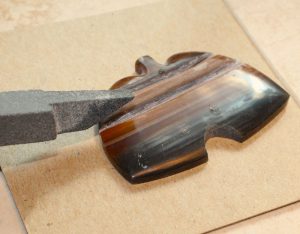 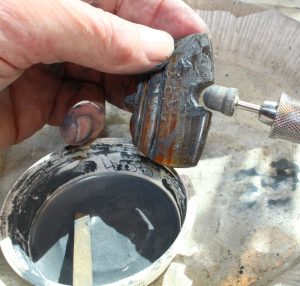 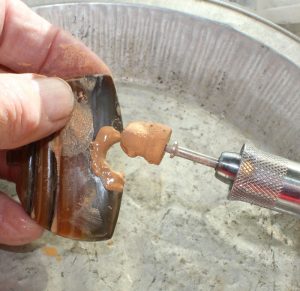 |
This story about cabochons for jewelry making previously appeared in Rock & Gem magazine. Click here to subscribe. Story by Bob Rush.


