
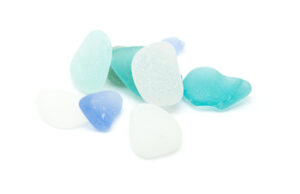
Making jewelry at home by melting silver is a basic skill that can be used to recycle scrap silver into handmade jewelry. Sea glass makes a perfect complement to this beautiful craft, especially when used to create DIY jewelry or sea glass pendants.
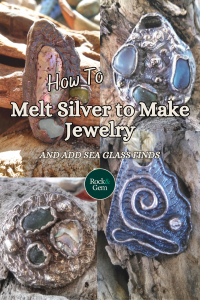
Walking along the beach, Allen McGhee isn’t just there for the beautiful ocean view. He’s on the hunt for sea glass and smaller beach stones to use when making jewelry at home, such as silver-cast pendants or recycled jewelry projects.
Preparing Cuttlefish Bone Molds for Making Jewelry
Cuttlefish are cephalopods like octopuses and squid. Their bone makes an excellent material for creating molds for jewelry-making endeavors. It is inexpensive and readily available from jewelry suppliers and pet stores. However, it’s generally cheaper at pet stores, especially those that buy and sell it in bulk.
Cuttlefish bones have a hard side and a soft side. It’s important to inspect each piece carefully to make sure the soft side of the cuttlefish bone is relatively flat. You don’t want any large cracks or indentations that can’t be easily sanded out. These can detract from your design or cause the cuttlebone to break while making jewelry.
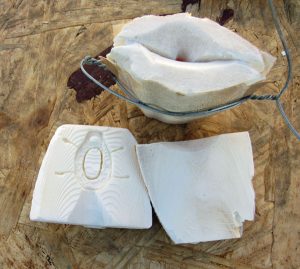
Choose medium-sized pieces that are large enough to cut in half. McGhee likes to use a flush-cut saw to halve his pieces, although you can use a jeweler’s saw or a coping saw.
Cutting the Cuttlebone
When cutting a cuttlebone in half, always place the soft side down and cut from the hard side. This helps prevent cracking or splitting. The cutting process will create a lot of dust, so be sure to wear the appropriate eye protection throughout the entire process.
You also want to make sure you’re wearing appropriate clothing since you will be working with an open flame. Clear your work surface so it is free of debris that can catch on fire, such as paper towels or cloth rags.
Sanding the Cuttlebone
After the cuttlebone is halved, you must prepare it to be used as a mold for making jewelry. Sand the soft side of the cuttlefish bone to create a smooth contact surface that provides a perfect fit between the two halves. Some people rub the soft sides of the two halves together, but McGhee likes to use sandpaper. Lay the sandpaper on a flat surface and rub the soft side of the cuttlefish bone along the top of the sandpaper, not vice versa.
McGhee uses a circular motion. Rubbing back and forth can create a curved surface you don’t want. Both halves must be flat when finished. While the sandpaper helps create a smooth surface, it doesn’t detract from the natural growth lines found within the bone. These lines resemble wood grain and give each piece a unique texture.
How to Melt Silver for Making Jewelry at Home: Simplified StepsSTEP 1: Cut the cuttlefish bone in half STEP 2: Sand the soft sides of the cuttlebone until smooth STEP 3: Blow off residual dust STEP 4: Carve a design into cuttlebone STEP 5: Bind the two halves together STEPS 6 & 7: Melt and pour the metal STEP 8: Remove the hardened metal jewelry piece |
How to Melt Silver For Making Jewelry – Carving the Design
McGhee carves all his designs while making jewelry freestyle by hand. This is probably the most creative part of the process and one he enjoys immensely as an artist. He creates each carving using a variety of wood carving tools and dental tools. Take care when carving your design because it takes very little pressure to etch the surface. You don’t want to go too deep and risk breaking the cuttlebone.
Designing the Setting for Sea Glass or Stones
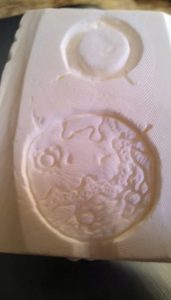
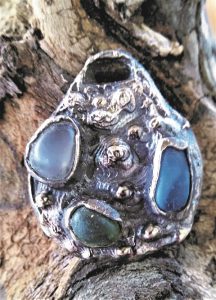
Carve your design into one of the halves of the cuttlefish bone and leave the other side unmarred. This is also when McGhee notches a place to insert a piece of sea glass or beach stone into the mold. Sometimes he incorporates more than one piece of glass or stone into the design based on what he envisions.
While he’s carving, he uses a manual air blower to remove dust from the surface of the cuttlefish bone so the lines of his design are crisp. Because he primarily creates pendants, he either includes some type of loop or opening in the design or drills a hole in the top of the finished piece for a chain. Once he’s satisfied with the design, he cuts some air reliefs. These are simply a few thin lines that radiate from the design.
“Air reliefs help make sure the melted metal gets all the way to the bottom of the mold,” said McGhee. “Without them, the metal may only fill the crevices of your design partway and it comes out incomplete. Since you can’t reuse the mold, you have to start over, but you can melt the metal again and reuse it.”
Putting the Sides Together
Next, sandwich the two halves together with the flat sides facing each other and bind them. McGhee likes to wire the two pieces together. He says you can also use a clamp but wire is easiest. No matter what you use, be sure the pieces are tight to ensure none of the scorching hot, melted metal leaks out the bottom.
Carve out a pouring cone at the top of the cuttlefish. The cone is a large indentation and should just meet the top edge of the design inside. This opening is where you’ll pour your melted metal.
Cuttlefish bone is a popular option for jewelry molds because it’s naturally resistant to the heat of melted metals, but the process does destroy the mold.
QUICK TIP: Don’t throw away your used cuttlebone. A cuttlebone mold isn’t reusable for jewelry-making, but it’s recyclable as plant food.
How to Melt Silver for Making Jewelry
McGhee prefers sterling silver when making jewelry because of its lower melting point. It’s easier to work with and more desirable than some metals. It’s also much cheaper than gold, making it a great metal when you’re learning. While he’s used bronze some, silver remains his go-to metal.
You can buy silver castings, sheets and tubes from various sources, but you can save money and practice recycling by purchasing used silver. McGhee buys broken jewelry, sterling silver flatware and other odd pieces of silver from pawnshops or at garage sales. When he uses old forks, spoons, cups or other large pieces of silver, he must first chop them down to size. The pieces must be able to fit inside your crucible. Plus, smaller pieces of silver melt faster than larger ones.
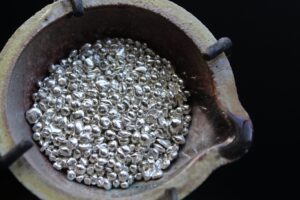
All you need to melt metal is a propane torch, propane, a crucible to hold the metal while it’s melting and some borax to act as flux. McGhee uses the small 16-ounce camp stove replacement propane tanks because they’re easier to manage, since they’re small and they’re relatively cheap.
When preparing to melt, estimate how much scrap silver you need to fill your mold.
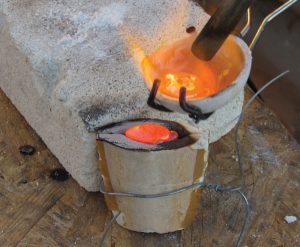
It’s better to overestimate because you can always remelt any unused metal. Place the metal into a ceramic crucible and begin heating it with your torch to melt it. Add a small amount of borax as it heats and starts to melt to prevent it from oxidizing. Carefully swirl the crucible as the metal begins to melt until it’s completely liquified.
Pouring Molten Silver When Making Jewelry
Once you have liquid metal, pour it into the pouring cone you created. Be prepared to pour the molten metal into your mold immediately. If it cools, it will harden again. To get a nice pour, you don’t want the metal to cool down even a little as it goes into the mold.
Once the liquid metal reaches the top of the opening, stop pouring. The metal usually hardens quickly but stays very hot to the touch for a while. The safest option is to let it cool inside the mold before opening it up.
McGhee likes to open the mold as soon as the metal has hardened and throw finished pieces into a container of water to cool down quickly. However, if you choose this route, be careful as the metal will be hot enough to cause a serious burn. Wear heat-resistant gloves to protect your hands.
WARNING! Cuttlebone puts off a strong odor once the hot metal is poured inside and singes the surface of the cuttlebone.
Things You’ll Need for Making Jewelry From Melted SilverSILVER SCRAP |
This story about how to melt silver for making jewelry previously appeared in Rock & Gem magazine. Click here to subscribe! Story by Moira K. McGhee.


