
Agate jewelry can be more than something displayed—it can be worn and enjoyed. For this project, I decided to step away from my usual display pieces and create a pendant designed for a necklace. I shaped the piece to include a drilled hole at the top, experimented with a frosted surface to complement sanded and polished grooves, and even set a stone in an off-center position for a unique, asymmetrical look.
Prepare the Agate Slab
I started by sketching the shape and the decorative grooves on a slab of Brazilian agate. Next, I trimmed to the sketched shape and refined the shape on my diamond grinding wheels. The inside curve on the top feature was ground dry with a heatless Mizzy silicon carbide wheel. I like to use these wheels because they grind quickly, and my progress is constantly visible.
This contrasts with wet grinding, where you have to constantly interrupt your grinding to dry the piece so you can see your progress. It is absolutely necessary for you to use safety glasses and a suitable respirator to suit your particular respiratory health when using these wheels!
My next step was to drill the hole for the decorative attached cabochon. Using a drill press, a 5/8-inch diamond core drill, and water, I ground the hole 2/3 of the way into the piece. Next, I used a diamond ball bur to remove the leftover center piece. This left a step to mount the stone in its assigned location. I used a diamond wheel-shaped bur to clean up the seat for the stone.
Carving Decorative Details for Agate Jewelry
My next step in making this agate jewelry piece was to use a small “V” bur to trace over the drawn shapes for the decorative grooves. I followed the grooves with a cone-shaped diamond bur to make them deeper and wider. The next step was to sand the grooves with 220-grit tumbling grit mixed in a condiment cup with a little water. I mounted a ½-inch dowel piece on a tapered screw mandrel and shaped it with a coarse file to make a raised ridge that matches the groove shapes.
I made a slurry of the grit and dipped the shaped wood bur into it. It’s important to wet the wood bur before using it. The grit can also be put into the groove with a small, narrow wood spatula. Keep sanding the grooves in this manner until they get smoothed out. Change to 400 grit for the final sanding step.
The finishing step involves making another wood bur dedicated to just the polishing step. Make it in the same manner as noted above. Mix some cerium oxide with water in a condiment cup and use a wetted bur to polish the grooves.
Finishing the Frosted Agate Jewelry Surface
The next step is to make the frosted face of the cab. Using a small piece of window glass lying in a tray with a little water and 400-grit tumbling media, place the front of the cab down and move the piece around and grind it flat. Check for flatness and a homogeneous frosty appearance across the full front surface. For a finer frosty look, go to 600 grit. I stopped with 400 grit.
My next step was to grind and fit the cab to the previously made hole in the cab while allowing for the silver scalloped bezel that went around the cab.
I made a silver cup for the cab to fit into so I could hold it in place and used Epoxy 330 to attach the mounted stone to the main cab cavity. This project took longer than expected, but the outcome was pleasing.
Turning the Cabochon Into Agate Jewelry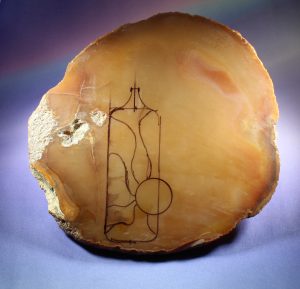 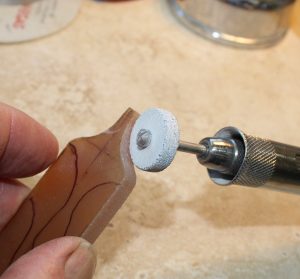 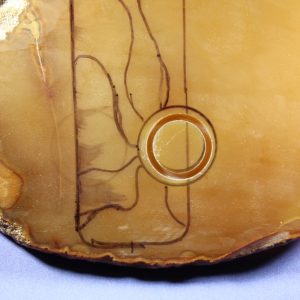  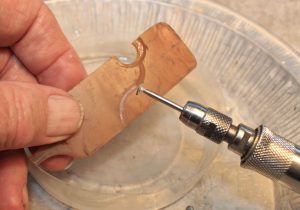 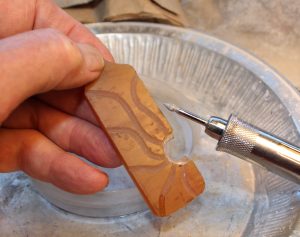 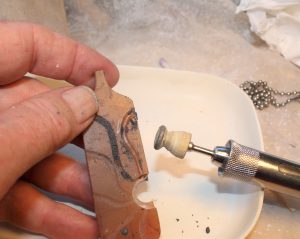  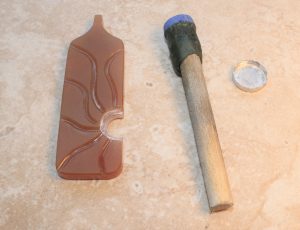
|

This story about making agate jewelry previously appeared in Rock & Gem magazine. Click here to subscribe. Story by Bob Rush.


