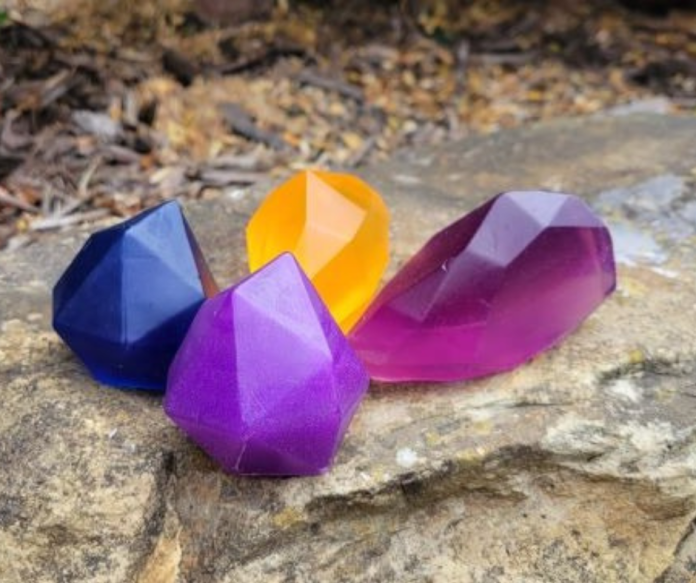
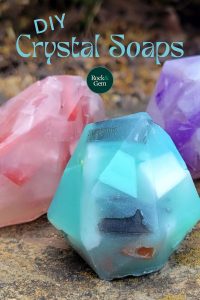
How to make soap may not be top of mind for rock collectors, but if rocks, gems, and crystals are your jam, here’s a fun DIY about how to make soap that looks like beautiful rocks. Think orange gems, blue gems or purple gems and sparkling crystals like quartz and amethyst. Grab some of your own favorite rocks and try to mimic them or create your own geologic oddities.
HINT: These soaps make great gifts, especially with the holidays coming soon. The small candy-size soaps are great gifts for moms. They can use them in the guest bathroom so that each person can have their own soap.
How to Make Soap: Melt & Pour
This DIY about how to make soap uses a melt-and-pour soap base. Melt-and-pour soap base has already gone through the first stages of soapmaking, so using it removes the danger of working from scratch with lye.
There are two different types of meltand-pour soap available – white and clear. Both come plain or with good-for-your-skin options like aloe, shea butter, oatmeal and goat milk. What you choose is a matter of personal preference and how you want your project to look in the end.
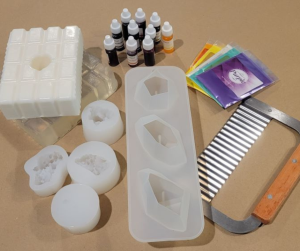
Materials You’ll Need
- White and/or clear glycerin soap base
- Soap dyes or mica colorants (Make sure they are soap-safe.)
- Soap molds (Rock and crystal shapes are great.)
- Microwave-safe container
- Essential oils or soap fragrance (optional)
- Spoon (for stirring)
- Rubbing alcohol (in a spray bottle)
 How to Make Soap Crystals: Basic Steps
The basics for this project are always the same. Building on the basics, the only limits come from your imagination.
Caution! This project involves handling hot liquids and sharp objects. Always work with an adult to make sure you’re safe!
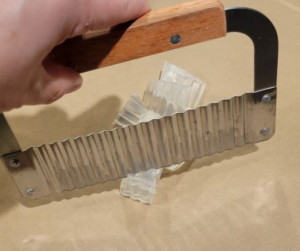
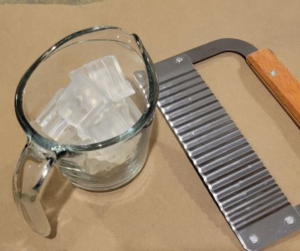
Step 1: Preparing the Soap Base
To start, chop the soap base into small cubes. Place the cubes in a microwave-safe container like a glass measuring cup. Remember to ask an adult for help when using the microwave.
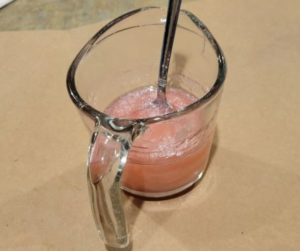
Step 2: Melting the Soap Base
Follow the heating instructions on your soap package. Most advise heating it on high for 30 seconds and then every 10 seconds until the soap melts completely. Stir gently after each time you heat it so it melts evenly. Stirring may cause unmelted pieces to melt. Make sure not to overheat your soap. Be cautious as the container may become hot.
Step 3: Adding Color and Fragrance
When the soap base is completely melted, add soap coloring first. Once the color looks good, you can also add a few drops of soap fragrance to create a delightful scent.
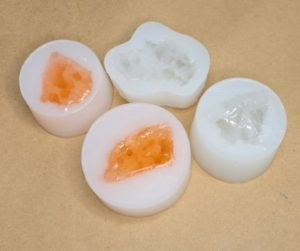
Step 4: Adding Sparkle
If you want your rocks and crystals to shine and twinkle, sprinkle a little soap-safe glitter onto the soap molds before pouring the melted soap.
Step 5: Pouring the Soap
Pour the colored soap mixture into your molds, then lightly spray the open surface with rubbing alcohol. This will help eliminate any air bubbles and give a smooth finish.
To make your soaps look even more realistic, create layers and textures. To do this, be sure to leave a space in your mold don’t fill the whole thing. After spraying the first layer with rubbing alcohol, let it cool and start to harden before pouring the next layer. Repeat this process for each layer.
Step 6: Hardening
Once your soap molds are filled and decorated, let the soaps sit undisturbed for several hours or overnight until completely hardened.

Step 7: Unveiling Your Crystal Soaps
When the soaps have hardened, carefully remove them from the molds. Gently push on the back of the mold or flex it slightly to release the soap. If it’s stubborn, you can try placing the mold in the freezer for a few minutes to help release the soap.
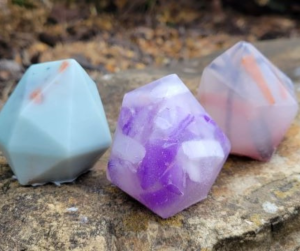
Fun Shapes
It’s easier now than ever to design crystal and rock soaps since there are lots of options for molds. The shapes used in this article came from a variety of places. The large crystal shapes were made with a soap mold from the soap section of the craft store. The smaller gem shapes were made with a silicone candy mold and the intricate crystals were made from soap molds from Amazon.
Quick Tips: There are crystal soap-making kits for kids. Purchasing one of these will give you a mold, coloring, scent and soap. This can be a good way to get started.
There is a trend where people put polished and tumbled rocks into the middle of their soap. As you use the soap, the rock is exposed. These can be fun to make using a favorite color or birthstone.
Happy washing and magical bathing!
This story about how to make soap previously appeared in Rock & Gem magazine. Click here to subscribe. Story and photos by Pam Freeman.


