
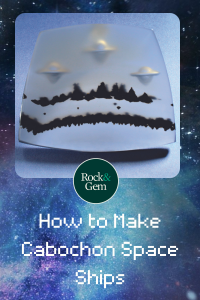
When planning how to make cabochon spaceships, I visualized carving the ships from the back. The milky background would lend itself well to carving.
Finding the Right Slab
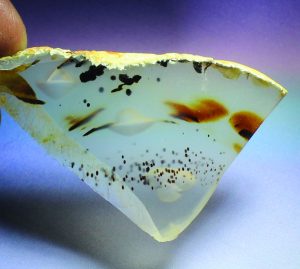
As I’m searching through my buckets of slabs, I have two mindsets. One is to bring back memories of when or where I bought or slabbed the pieces, and the other is to study the slab colors or patterns to see if they trigger anything special for my next project.
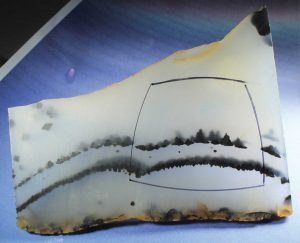
I’ve had this slab of Montana agate for quite a while. It has kept migrating to the top layers of the pile. There is nothing noteworthy or eye-catching about it other than the unique parallel black lines on a milky background.
UFO Inspiration
With recent news articles talking about the possibility of UFOs, it made me take a deeper look at this piece. Quickly, I visualized carving some spaceships from the back of the material. The milky background would lend itself well to carving from the back. With this material, the clearer and lighter, the better the images would show through.
I selected the best area and shape that I could utilize from the material and made a cab accordingly. It is 48mm wide at the bottom and 39mm high. I marked the front with a felt tip pen to locate the best locations for the carved images.
Carving Spaceships
Because I have never carved a spaceship, I did a test piece to see what tools I needed and to see what shape was possible. The tools consisted of a 4mm diamond ball bur, a 5mm inverted cone and a 10mm knife-edged bur.
I also made two wood burs with a ball shape on the end to sand and polish the top hole in the image. After carving the round hole, and polishing it, I found that it didn’t show as I had expected. Therefore, I left the hole with the grind pattern in it.
I started by using the ball bur to make the “canopy” of the spaceship. Next, I used the knife-edge bur to make a narrow horizontal cut across the center of the hole(slightly deeper than the hole and about twice as wide as the hole). Finally, I used the inverted cone bur to shape the bottom of the spaceship.
Carving to the Right Depth
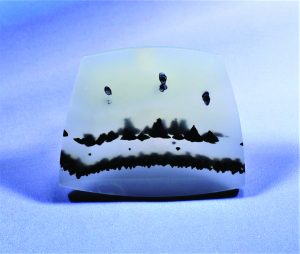
Initially, I made all three images the same depth in the back of the cab. Yet, due to the cloudiness of the left-hand side of the cab, the images on that side didn’t show through as well as the right image did.
I had to carve them much deeper than the right side for them to show well. I left the carved images with a 400-grit surface because it enhanced the look of the images. I found the carving to be rather easy and not too critical in detail. I was pleased with the result.
These Bench Tips about carving cabochon space ships previously appeared in the October 2021 issue of Rock & Gem magazine. Click here to subscribe! Story by Bob Rush.


