
By Bob Rush
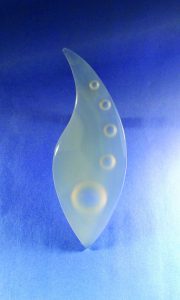
In Part I of this column, I described making a cabochon in which I carved circular depressions into the back. I used milky chalcedony because I was fascinated with the inner glow the chalcedony radiates when it is made into a cab. It also has enough translucence for the carving on the back to show through when the cab is viewed from the front.
Seeking a Striking Cab Design
I decided to do another cab that included even more circular features and a more complex pattern. This time, I would use milky chalcedony that had a scenic pattern. The results were strikingly better. Even though milky chalcedony definitely stands alone in its beauty, the absence of any pattern in the material could limit the overall visual possibilities when work on the back is being considered.
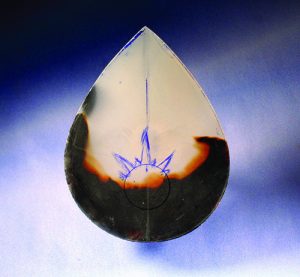
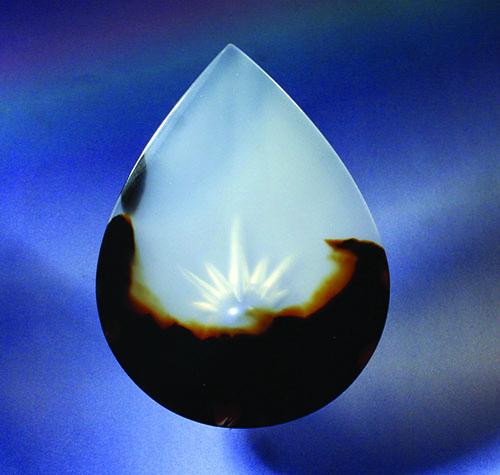
I started searching through my slabs for one with a light “sky” and a dark horizon. After quite a bit of searching, it suddenly dawned on me that I had already made a cab from a slab of Montana agate that met these requirements. With a bit of searching, I finally found the matching slab. Its pattern resembled mountains and a sky, and I had envisioned that the round feature would have some grooves pointing away from it that would look like rays of light emanating from the sun.
I shaped and cabbed the slab as a prelude to locating the ideal placement and shape of the feature that I was going to carve on the back. The carving process started by using a small, round diamond bur to locate the center of the soon-to-be-larger round depression. Next, I enlarged the feature with various grit ½-inch diamond burs and ground about halfway through the agate. I verified that the feature would show through the front of the translucent agate material.
Turning to Wooden Wheels for Sanding
Next, I sanded this depression with wooden wheels, made from dowels that had been rounded on the end, utilizing tumbling grits of varying coarseness. I would polish the hole after I ground and sanded the rays of the sun.
I sketched the locations of the rays around the circular feature, determining the spacing
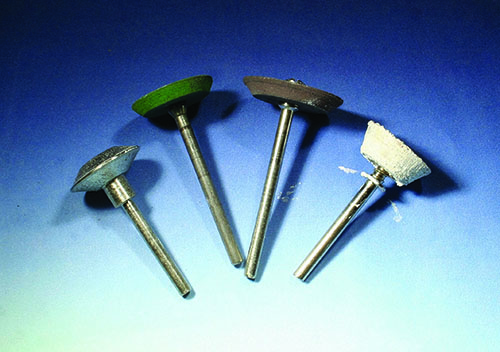
and the length of the rays. I used a diamond V bur, shaped Cratex wheels, and a shaped wood wheel for working on the rays. I ordered a set of three V burs and a set of 220 grit ball burs from Dave Clayton of jadecarver.com so that I would have all the necessary grinding tools for the project.
Using the 220 grit diamond V bur, I carefully ground the rays deeper near the circle and shallower out toward the ends. Next, I shaped some Cratex rubberized sanding wheels of various grits with a grinding wheel diamond dresser. I completed the sanding and then went to a wooden wheel that I shaped from a segment of a 5?8-inch wooden dowel to do the polishing. Using a wooden wheel shaped with a rounded point, I finished polishing the round feature.
The finished cab definitely was enhanced by the carved pattern on the back.
Author: Bob Rush
 A professional within the lapidary industry since 1958 and metal work and jewelry since 1972.
He teaches at clubs and at Camp Paradise.


