
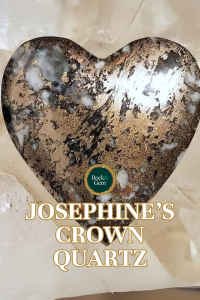
Oregon quartz and metallic lapidary materials have always been desirable for lapidaries and jewelers. Josephine’s Crown quartz is an Oregon quartz with an elegant look to it with its steamers of metallic colors, predominantly gold from its mix of pyrite and chalcopyrite. This material comes from southern Oregon and is composed of pyrite, chalcopyrite, and various sulfides mixed in white and black quartz. It is found in nearby gold and silver mines. It’s not unheard of to actually find trace amounts of gold in this material, as well.
Josephine’s Crown quartz is relatively hard (Mohs scale of hardness 5 to 6) since the main host rock is a fine-grained, high-silica Oregon quartz. However, since pyrite and chalcopyrite are much softer, a greater amount of metallic material may make the stone seem as if it’s much softer. That is something to consider when beginning to cab this material, as it will undercut if you don’t take precautions.
Cabbing Josephine’s Crown Quartz
Slabbing this material is rather easy; there’s no real direction to cut since the material will generally have the same look when cut from any direction.
Pay close attention when preforming your material to your cabochon shape. Try to keep most of the host material toward the edges and not very much of the pyrite since it’s the softer portion of the material. If you don’t, you can easily lose your edge and have it roll over and lose some of the girdle.
Begin on an 80-grit wheel to cut and dome your shape, then move on to the 220-grit stage. Here is where you will want to make the most out of shaping and doming your cab and smooth it as much as possible before moving to the next steps. Working on the 220-grit wheel will remove material at a comparatively even rate. That is most important because once you move on to the soft resin wheels, this is where the undercutting will start.
Undercutting Explained
Undercutting is when two components mixed into the same material grind away unevenly because of different hardnesses. This gives you a surface that’s not uniformly smooth. It is important to continue to check your edges and make sure you don’t hit any soft areas. It is also important not to round over too much in one portion of your girdle and lose that uniform size all the way around your cab.
Once you feel you’ve achieved a smooth finish on your 220-grit wheel, move on to the 280-grit stage where you should go easy with a light hand to avoid any deep undercutting. Stop when you feel this stage is close to complete and dry off your cab and check for any deep scratches. If you see micro swirls within the gold metallic areas, this is usual for this stage and nothing to panic over, remember these are the softer areas and the other wheels will smooth this out as you go.
Finishing Up
From this point on, finish out as you would any other cab; dry between stages, and make sure you don’t go any farther if you find scratches. Finishing on a 14,000-grit wheel will leave you with a beautiful and glossy finish; however, if you have a 50,000-grit wheel, I highly suggest using it to enhance the metallic shine.
Once you’ve finished polishing on the diamond resin wheels, this material will take on an extra luster if you polish it with cerium oxide on a leather buf, and it will be all ready for a nice setting.
This story about Oregon quartz and Josephine’s crown quartz was written by Russ Kaniuth and previously appeared in Rock & Gem magazine. Click here to subscribe.


