
Stone carving and polishing by hand can be done with certain stones that are soft enough to create small sculptures using commonly available hand tools. Let’s learn which stones, how to do it and see some wonderful results.
Selecting the Right Rock
For hand carving, you want a relatively soft stone, on the order of calcite, or no more than three on the Mohs Scale of Mineral Hardness. Here are examples:
• Soapstone (talc-schist) has Mohs hardness of one. It’s the preferred stone for beginners because it’s soft, inexpensive and common,
• Alabaster (a fibrous form of gypsum) has a Mohs hardness of two. It comes in pastel colors and sometimes exhibits translucency. Alabaster has been a desired carving stone for centuries.
• Marble and travertine can be plain, colorfully mottled, or banded, making them extremely attractive. But at Mohs hardness of three, these take more effort to carve.
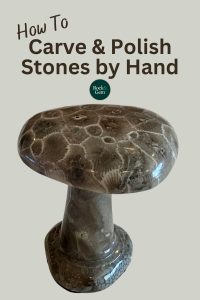
• Petoskey stones (the fossil coral Hexagonaria) are carbonate-based and are easily polished by hand. Small cobbles are just the right shape for producing toadstools, which can be found in tourist shops all across Michigan.
Using the Right Stone Carving Tools
 Once you have a stone, you’ll need a basic tool kit. Consider including:
• Hacksaws (large ones for slabbing; small ones for trimming)
• Coarse-toothed wood rasps and large steel files (for removing large quantities of stone and basic shaping)
• Small diamond files, straight and curved (for fine work)
• Carving knives, scribes and dental tools (for detailing)
• Sanding boards and wet/dry sandpaper in grits ranging from 180 to 1200 (for smoothing)
• Brushes (for clearing dust off a piece);
• Leather, denim, or cotton flannel infused with aluminum- or tin-oxide (for polishing)
Safety First!
 Sawing, filing and sanding raises dust, so work in a well-ventilated area or outdoors and/or have a venting fan and wear a face mask to guard against inhaling dust. The finer you sand, the less dust kicked up, but even if you can’t see it, you’re breathing it. Also, consider wearing fingerless gloves to help guard against nicks when working with knives and scribes.
Getting Started Stone Carving
Most beginning carvers start with a thick, flat rectangular rock slab. They use a marker to draw an outline of what they wish to create. Sketch the proposed object on all sides. Some suggest making a clay model for a 3D guide to follow.
Proceeding Step-by-Step
Step One: Sawing. Use a hacksaw to remove as much excess material as possible from around the sketch on your stone. Proceed carefully so as not to cut off too much or produce deep gouges. This “rough shaping” can be the most time-consuming of all the steps.
Step Two: Filing and Shaping. Turn to rasps and files to round your sculpture into its more-or-less final shape. Start with rasps to take off large edges, then shape with files. Use progressively finer files as you go, starting with steel files and ending with diamond files. It helps to “nest” your rock on a sandbag to keep it firmly in place while working.
 Step Three: Sanding and Smoothing. Grits of wet/dry sandpaper go from coarse (40- 60), to medium (80-100), fine (120-180), very fine (220-240), extra fine (320-360) and super-fine/polishing (400-1200+). Hardware stores carry packets with a variety of grits. With softer stones, start with medium-fine grit since coarse grit may leave deep, hard-to-remove scratches. Move to ever finer grits, occasionally brushing or rinsing the rock to remove dust.
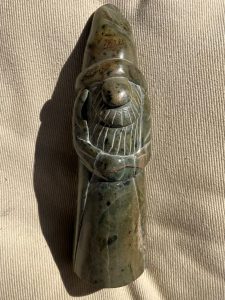
Step Four: Detailing. If you want a lot of detail in your work, use steel knives, scribes and/or dental picks. Engraved lines can be smoothed out if desired with very fine curved diamond files.
Step Five: Polishing. Start with extra-fine/ polishing sandpaper. Then thoroughly wash the stone. Mix a paste of water and polishing compound (like tin- or aluminum oxide) and brush it into a bit of leather, denim or flannel to rub a final polish. Sometimes, rather than a polish, colorless beeswax is rubbed in.
Proudly Sharing & Displaying Your Stone Carvings
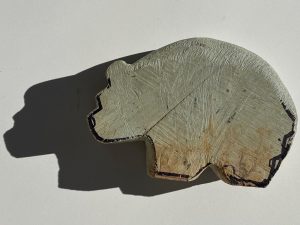
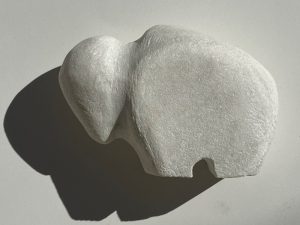
Carving takes patience. Early efforts might look crude and rudimentary, but don’t give up! With practice, you’ll take pride and satisfaction in transforming dull rocks into dazzling works of art to share at a gem show.
This story about stone carving and polishing by hand previously appeared in Rock & Gem magazine. Click here to subscribe. Story by Jim Brace-Thompson. Carvings by Junior Rockhound Rylee & His Grandpa Dick


